

Nothing crashes the flavor party in a cup of coffee faster than a crusty, grimy coffee maker. That bitter, slightly "off" taste is a sign that your brewer is crying out for help. Luckily, the cure is probably already hiding in your pantry, and it costs less than a latte.
By the end of this 5-minute read, you’ll know exactly why, when, and how to deep-clean your brewer using plain white vinegar. No fancy chemicals, no confusing steps, no guesswork.
Why Cleaning Your Coffee Pot Matters

Your daily brew might taste bold and fresh, but underneath the surface, your drip coffee maker could be hiding a mess.
With every brew cycle, natural oils from coffee cling to internal surfaces and can eventually go rancid. Meanwhile, minerals like calcium and magnesium from tap water create limescale, a chalky buildup that accumulates inside your machine over time.
Add in coffee stains on the glass carafe and brew basket, and your once-reliable brewer can quickly become a flavor-killer.
To make matters worse, the warm, moist environment inside your coffee maker’s water reservoir is a breeding ground for bacteria, yeast, and mold. In fact, an NSF study found that nearly 50% of home coffee reservoirs tested positive for microbial growth.
A dirty drip coffee maker doesn't just impact how your coffee tastes. It also affects how well your machine functions and how long it lasts.
When you clean your coffee maker regularly, you keep it spotless, protect your investment, and get the most out of every cup.
Why Vinegar is an Effective Coffee-Pot Cleaner
Before you reach for harsh chemicals, consider the humble bottle of white vinegar. It’s one of the easiest and most affordable ways to clean your coffee maker, and it's been trusted for generations to safely remove buildup from kitchen appliances.
Here’s why vinegar continues to be the go-to solution when learning how to clean a coffee pot:
- Its acetic acid (usually around 5%) is a natural powerhouse that effortlessly dissolves calcium and magnesium deposits.
- It’s a natural disinfectant. Studies show that acetic acid at 5–10% concentrations can effectively reduce common kitchen pathogens like E. coli and Staphylococcus aureus when used on surfaces.
- Vinegar is safe for food-grade plastics and glass, making it ideal for most coffee maker components.
- It’s a budget hero, costing less per clean than expensive, single-use branded descalers.
What You’ll Need
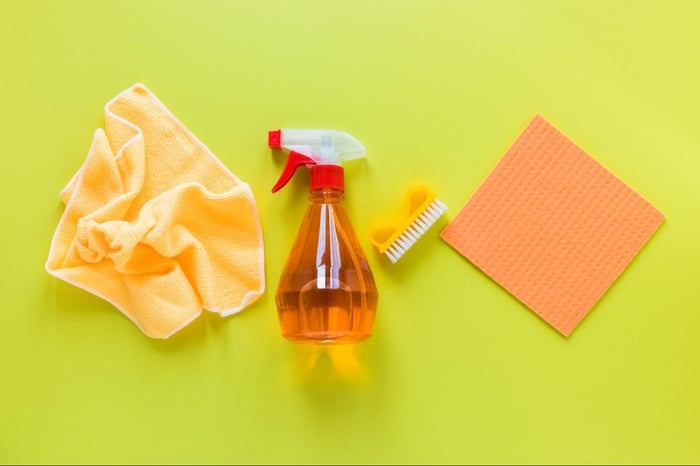
Gather these simple supplies, and you'll be ready to banish the gunk and get back to brewing brilliant coffee.
- 1 cup white distilled vinegar
- 1 cup fresh water (adjust for larger reservoirs)
- Mild dish soap & a soft sponge/cloth
- A new paper or clean reusable mesh filter
- A dry towel
- (Optional) A small bottle brush for stubborn corners
Step-by-Step Guide to Cleaning Your Coffee Pot

Ready to clean your coffee maker and bring back that fresh-brewed flavor? Follow this simple method to remove buildup, eliminate stains, and keep every brew cycle tasting just as good as the first.
Step 1 - Unplug and Disassemble
Before you begin, turn off the coffee maker and unplug it to ensure safety. Remove the glass carafe, brew basket, and any other removable parts like the filter holder.
Wash each piece thoroughly with warm water and mild dish soap to remove surface oils, coffee stains, and loose residue. Giving these components a quick rinse first allows the vinegar solution to better target internal buildup during the deep clean.
Step 2 - Mix the Vinegar Cleaning Solution
Pour a mixture of 1 part white vinegar to 2 parts water into the water reservoir of your coffee maker. This dilution is effective for breaking down limescale, coffee oils, and mineral deposits without being too harsh on internal components.
If you live in a hard water area, you can increase the vinegar strength slightly for a deeper clean. Just be sure not to exceed a 1:1 ratio to avoid damaging delicate parts. Fill the water reservoir to the MAX line so the solution can reach all internal areas during the brew cycle.
Step 3 - Start a Half Brew Cycle
Place an empty paper filter into the basket, then turn on the coffee maker and start a brew cycle. Let the vinegar solution run until about half of it fills the carafe.
At this halfway point, pause the coffee maker to allow the solution to soak. While it's hot, use the warm vinegar mixture from the carafe to wipe down the lid, exterior, and other surfaces that collect grime. This helps clean both the inside and outside of your machine more effectively.
Step 4 - Let the Solution Soak
After stopping the brew cycle, let the remaining vinegar solution sit in the coffee maker’s internal system for 30 to 60 minutes. This soak gives the solution time to break down mineral deposits and remove stubborn residue, especially useful for machines used heavily or with hard water.
Step 5 - Resume Brewing and Discard
Restart the machine and allow the rest of the solution to brew fully. Discard the hot vinegar solution down the drain and toss the used filter. You might notice a vinegar smell at this stage, which is completely normal and will disappear after rinsing.
Step 6: Run Fresh Water Rinses
Fill your coffee maker’s reservoir with fresh water and run two complete brew cycles to flush out any leftover vinegar. This step helps clear the internal system and ensures no lingering taste affects your next brew.
If the vinegar smell is still noticeable after the first rinse, try adding a small pinch of baking soda to the second batch of fresh water to help neutralize any remaining odor. This simple step leaves your coffee maker clean, fresh, and ready for your next perfect cup.
Step 7: Wash the Accessories and Exterior
Once the rinsing is complete, take a moment to hand-wash the carafe and brew basket again using warm water and a mild dish soap. These parts often collect residual oils and buildup that can affect the flavor of your coffee.
Next, use a damp cloth to carefully wipe down the exterior of your coffee maker, paying close attention to buttons, handles, and any spots prone to splashes.
For a polished finish, a dry microfiber cloth works great for getting a streak-free shine, especially if your coffee maker has stainless steel components.
Step 8: Let Everything Air-Dry
Before reassembling, let all components dry thoroughly. Leave the reservoir lid open to help evaporate any remaining moisture inside the coffee maker. This reduces the chances of mold or mildew developing between uses.
In a hurry? You can temporarily delay deep cleaning by swishing hot water and a drop of dish soap in the carafe right after brewing. Just be sure to follow the full vinegar cleaning process weekly or at least monthly.
Bonus Tip: For homes with hard water, increase your cleaning power long-term with that stronger 2:1 vinegar-to-water ratio. It'll keep mineral buildup at bay and your next brew tasting its best. |
How Often Should You Clean Your Coffee Pot?
Regular cleaning isn’t just about hygiene; it’s the key to better-tasting coffee and a longer-lasting machine.
Over time, natural oils, mineral deposits, and residue can build up and impact the quality of every brew. Establishing a regular maintenance routine can make all the difference.
Here’s a simple guideline to follow based on your habits and environment:
Daily Cleaning
After each use, dump any used coffee grounds, rinse the carafe and brew basket with hot water, and wipe down the exterior. This quick reset keeps things fresh for your next brew.
Weekly Cleaning
Give all removable parts a deeper clean with warm, soapy water once a week. This includes the reservoir lid, carafe, and brew basket. Focus on areas that can accumulate residue quickly over time.
Monthly Deep Clean
At least once a month, run a full vinegar cleaning cycle to descale your machine and clear out mineral buildup that can affect taste and performance.
In Hard-Water Areas
If your water is high in minerals, you're more likely to see calcium deposits. In these cases, consider deep cleaning your coffee maker every two weeks to prevent limescale buildup and keep everything running smoothly.
If You Brew Flavored or Seasonal Coffees

Flavored coffees and cozy seasonal flavors tend to be richer and oilier. These oils can coat internal parts of your machine and affect the flavor of future brews.
If these are your everyday go-tos, a biweekly deep clean is a smart move to keep your coffee tasting its best.
Keeping your coffee pot clean doesn’t need to be complicated. Just a little consistency goes a long way toward preserving flavor, performance, and the overall joy of your daily brew.
Tips & Best Practices

These quick habits help extend the life of your coffee maker and ensure every brew tastes as fresh as the last.
- Use white distilled vinegar only. Apple cider vinegar can leave behind residue, and cleaning vinegar is often too strong, potentially damaging plastic parts.
- Add lemon juice if needed. If a sour smell lingers after rinsing, run one more cycle with a teaspoon of lemon juice in the water to neutralize it.
- Brew with filtered water. It helps prevent mineral buildup and slows the need for frequent deep cleaning.
- Let your machine air out. After brewing or cleaning, leave the reservoir lid open to allow moisture to evaporate and discourage mold growth.
Safety First: Never mix vinegar with bleach. This combination creates toxic chlorine gas, an extremely hazardous chemical to inhale. Keep your cleaning agents separate. |
Your Coffee Maker Deserves a Refresh
A sparkling-clean coffee maker isn't just about looks; it's about better taste, a longer appliance life, and peace of mind from using zero harsh chemicals. So grab that bottle from your pantry, give your brewer 45 minutes of TLC, and reward yourself with a phenomenal cup of a limited-edition Bones roast. We promise you’ll taste the difference in every single sip.
Ready to celebrate your squeaky-clean machine? Explore our latest limited-edition flavors of coffee before they vanish!